[
Race |
Class |
Avatar Customization |
Ship Customization ]
[
Starting Play |
Experience |
Faction
]
Next, you'll be able to customize the look of your character avatar. This is the representation of your character when
you're outside of your ship, in a starbase or planetside lounge, or when you send a transmission to another character.

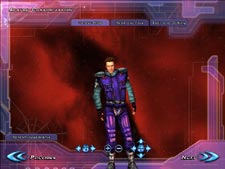
Character Gender Selection
Click Thumbnail to Enlarge |
You have a wide range of customizable features for your avatar. You may change your selections at any time in the customization process. But remember, once you finish your avatar customization, set
the name, and click Play Game, your character's avatar is locked in. You won't be able to change that character's avatar again without
recreating the entire character.
The '+' and '-' buttons allow you to zoom in/out. There are also options to rotate your avatar and move the avatar around the screen. These buttons
are located on the bottom of the interface.
There are also four buttons on the AVATAR CUSTOMIZATION screen that are used to generate a customized Avatar. These are described below.
Random Appearance
On the bottom left of your screen, you'll see a button labeled RANDOM APPEARANCE. When you left click on this button, an avatar will be randomly generated using various customization settings, though your gender will not be changed. If you're using either the HEAD AND FACE interface or the BODY AND CLOTHING interface, only the items changeable within that customization screen will be randomized. You may select RANDOM as often as you like to quickly create a unique avatar look.
Gender
The topmost button on the left hand menu will read either GENDER: MALE
or GENDER: FEMALE initially. This button acts as a toggle, switching your
character model between the two genders. Simply left click once with your
mouse over the button to choose your gender.
Head and Face
The middle button at the top of this screen
allows you to select the basic head and facial shape, hairstyle, facial
hair (if you have selected a male avatar) and accessories to decorate your
face and ears. You may also opt to customize a tattoo by using the DETAILS
button, located in the FACE customization options.
Hair

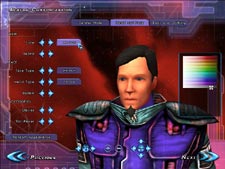
Customize Character's Hair
Click Thumbnail to Enlarge |
You can choose different hairstyles by clicking the arrows in the section labeled STYLE. Click the right arrow to move
forward and the left arrow to go backward through the selections. You may also choose the color of the hair by clicking the HAIR COLOR button
and selecting a color from the palette on the right side of the screen. To do this, hold your cursor over the palette and hold your left mouse
button done. Move the cursor around the palette (while holding the mouse button down) to select a hair color. Male Avatars can also have facial
hair by selecting the row labeled BEARD. The color of facial hair will match the hair color you have selected for the avatar.
Face
You can choose different face types by clicking the arrows in the section labeled FACE TYPE. Click the right arrow to
move forward and the left arrow to go backwards through the selections. SKIN COLOR AND EYE COLOR can be customized
first by clicking the appropriate button, and then selecting a color from the palette. The HEAD TYPE button further customizes the shape of the
selected FACE TYPE by making minor adjustments to the length and width of the face. Finally, tattoos can be added to your avatar's face by scrolling
through the DETAILS arrows to select a tattoo. Tattoos are highly customizable. After you select a tattoo, you can use the +/- buttons to enlarge/decrease
the size of the markings. You may also move the tattoo around the avatar's head by moving the blinking cursor around the box that appears when you
select a tattoo. The cursor is manipulated in the same fashion as the color palette.
Accessories

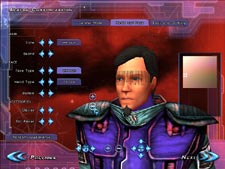
Customize Details/Accessories
Click Thumbnail to Enlarge |
You can choose different head accessories by clicking the arrows in the
section labeled ACCESSORIES. Click the right arrow to move forward and
the left arrow to go backward through the selections.You may choose from
several GLASSES styles and EAR PIECE styles under this option.
Body and Clothing
The rightmost button on top of the Avatar Customization screen allows
you to set your avatar's basic physical appearance, adjusting the height
and weight, and select clothing style and color.
Clothing
You can choose different clothing styles and colors by clicking the arrows in the section labeled CLOTHING. Click the right arrow to move forward
and the left arrow to go backward through the selections. The SHIRT STYLE row gives you several shirt styles to choose from. You may further
customize the shirt by coloring different sections of the shirt. To the right of the SHIRT STYLE arrows are two buttons labeled SHIRT COLOR 1
and SHIRT COLOR 2. Click on one of these buttons and select a color by clicking and dragging your cursor around the color palette on the right
side of the screen. You may also select one of the metallic colors by clicking on one of the rotating METAL boxes, located under the color palette. Click on the other shirt color button to repeat this process on a different area of the shirt. SHIRT COLOR 1 and 2 change different parts of a shirt depending on which style you have selected. The PANT STYLE selection operates in the same manner as the SHIRT STYLE selections. There are also two PANT COLOR buttons to further customize the look of your avatar's pants.
Body

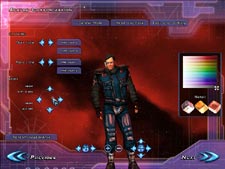
Customize Physique and Clothing
Click Thumbnail to Enlarge |
You can alter your avatar's body shape by clicking the buttons in the BODY section. The UP and DOWN arrows adjust the avatar's
height. The LEFT and RIGHT arrows adjust the avatar's weight. You may also adjust these factors by moving the blinking cursor in the box, located
between these arrows. The cursor is manipulated in the same fashion as the color palette.
When you've finished your alterations to your avatar, you should use your
mouse to left click on the NEXT button to go to the ship customization screens. Left clicking with your mouse on the PREVIOUS button will return
you to the character selection screen without saving any changes you might have made.
Character Name
Once you have customized your ship, you'll be able to select your character's name by left clicking on the button that
reads CLICK TO SET NAME. This
will place a text cursor in the button and
permit you to type in your preferred character name. As you begin to type,
the button will turn yellow. You have a total of 20 spaces to use in creating
your name and you may only use.
When you consider your character's name, please keep in mind the Earth & Beyond Rules of Conduct and be certain that you do not choose an inappropriate name.
Galaxy Selection
You'll also be able to select which galaxy server cluster you'd like to play upon. A list of server clusters will appear
in the lower right hand corner of the screen and will display the number of players in that galaxy. An arrow button at the bottom of the list allows
access to more servers, by left clicking on the arrow with your mouse. You must select a galaxy by clicking on the name prior to clicking the
PLAY GAME arrow.
Choosing the BACK button by left-clicking with your mouse will return you
to character customization options without saving your name or galaxy selection.
Choosing the PLAY GAME button by left clicking with your mouse will begin the game. Megan will let you know when everything is ready to go and then
you'll see the Earth and Beyond splash screen.
You may start the character in the tutorial sector or elect to bypass
this option and begin in the starting (newbie) sector by clicking the TUTORIAL button. We encourage you to go through the tutorial sectors if
you have not done so before for the race and class you have chosen for your character.

[ Race | Class
| Avatar Customization | Ship
Customization ]
[ Starting Play | Experience
| Faction
]
|